Sunday, September 20, 2009

Breaking new ground

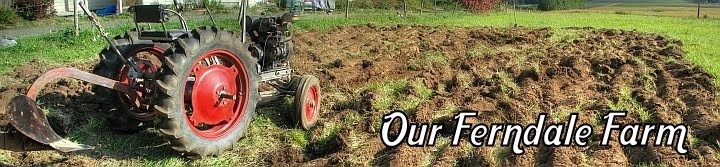
Part of the reason I got the tractor was to use it to expand the garden space. I decided this year that some crops would be more easily managed if they had their own space outside of the main garden. So, I spent a day or two getting the tractor implements cleaned, greased up, and operational and went to work making the field garden plot.

The first step is breaking up the turf a bit, so the plow doesn't have to work quite as hard to break the sod into strips and turn it over. A weighed-down disc harrow passed over a few times cut up the turf pretty well.

A few days later, after some rain finally came to moisten the soil a bit, plowing was next. Getting the plow and tractor set-up correctly and figuring out the technique took some time, but soon enough I was turning over rows nicely. Cut about 6-8" deep. My 50's era scanned copy of the "Plow Book" by Harry Ferguson (of Massey-Ferguson tractors) came in quite handy.

I'm was pretty happy with the plowing result. For being such a small tractor, the Gibson had no problem pulling the plow, after I got the hang of keeping the throttle up enough.


After a day of drying out, the field was ready to be disced until chopped up fine enough. I started with the two sets of disks in-line with each other, and gradually decreased the angle between them (more aggressive tillage) until I was happy with the tilth. It took probably 8 passes total over the whole garden.

The end result is almost as good as if I had rototilled it; about 6-8" deep, finely crumbled soil. There are still some small clumps of sod, which I am hoping will dry out and die, and then decompose over the winter and not re-establish as grass.

The next step is sowing the cover crop. I'll be using a "plow down mix" I picked up at the feed store, which is a mix of fall rye, Austrian winter peas, vetch, and rape. It's important that the ground isn't left bare over winter, when the winter rains will wash away soil and leach out nutrients to runoff. I have mentioned the benefits of cover cropping/green manuring in the past, here.


So for next year: crops that are exceedingly tall, require lots of space, are vining or sprawling, those suited for row-cropping, or ones that have a long growing season are all good candidates for growing in their own area. In the main garden (right off the house) I want the crops that I use most often, are the quickest to mature (so I can succession plant better, another goal for next year), and those that require more care or more frequent inspection. I'm thinking that the main garden will be spring/fall crops (2 or more plantings a season) and the field garden will be main season summer crops (1 crop per season). Then I'll switch them each year for a good rotation. We'll see how it goes.

Friday, September 11, 2009

Nuts update

After my nut tree update I read some more about when nut trees mature and how to harvest them. Filberts will fall from the tree when fully ripe, so all one has to do is come along and pick them up, cure them for a week or so, and store them.

I went out to check the trees and found quite a few on the ground, so I collected them and put them in the garage to dry out. It felt like a lot of the nuts were hollow, and when I broke a few open some were! It felt like about half of the nuts had no "meat" inside, so after they cure I'll have to weed out the bad ones. The trees are still covered in nuts so I will have a lot more to pick this fall.

The green walnut husks will open up when the nut inside is mature, which can then be easily picked. Only one was open, so they are later than the filberts. We have way more walnuts than filberts, so I hope they are good.

Monday, September 7, 2009

Fresh fruit (and nuts)

I have been very happy with how all the fruit did this year - mostly because I was able to avoid mangling them too badly while learning to prune this spring. The cherries were excellent earlier this summer, as were the raspberries (even though many were eaten by deer) and blueberries. We have been eating the blackberries that line our property for a few weeks now, including a pie and cobbler!

Here's what I picked yesterday to test ripeness. The Asian pears (upper left) are ripe and very good, the apples are not quite ready, and the Bartlett's are mature and very good after a few days ripening. On apples and asian pears, a change in "background" color from green to gold and a slight give when a thumb is lightly pressed into the fruit indicate ripeness. Bartlett's are tougher, as they are picked "mature" but not "ripe". If any on the tree start to go yellow even in the slightest, then the others that are still green are likely ready to be picked. We ate one last nigth that I picked last week - it was delicious.

Italian plums (probably). Good for cooking, good fresh, and good to give away!


Gala apples are small. I should have thinned the fruit so the remaining could grow larger. These are not quite ready.


Walnuts. I have no idea when these are ready (or how this strange fruit becomes a walnut).

Hazelnuts are starting to color up. We have 3 nice big filbert trees out front - should have lots of hazelnuts so I'll have to read up on how and when to harvest nuts.

Sunday, August 30, 2009

New animals

A few months ago my Dad gave me his group of roller pigeons, along with their loft. We spent a few hours getting it unloaded, putting it back together, and getting the pigeons safely housed. About a half-hour later, I was behind the house and I heard birds flapping - looked up to see them all flying around. They escaped - not good! After pigeons are moved they need about a month of confinement so they can re-learn where "home" is (or more accurately, where the food is). So they flew around for a few days, wouldn't come back to their loft. Eventually I was able to capture two of them. Unfortunately, one was killed under mysterious circumstances a few weeks later (I suspect a weasel). So I had one pigeon, until now.

I got 7 pigeons from an older guy who was downsizing his flock. So now I have 8 (and I have built a proper locking door for the loft).

Here's a video of what roller pigeons do while flying - pretty weird.

Saturday, August 29, 2009

Putting up corn

Well we ate as much corn as we could that last 10 days or so, and it is just starting to get over the hill. After it reaches full maturity (when kernels are easily punctured by a fingernail and they exude milky fluid), corn has a small window where it has the maximum sugar content in each kernel, after which it begins to turn these sugars to starches, resulting in less sweet and chewier corn. Furthermore, it does not sit ripe on the plant for very long, especially if you grow anything other than modern, hybridized "super sweet" varieties. These are bred to stay sweeter for longer on the plant, and to stay sweeter for longer after being picked. I grew a hybrid "sweet corn", but not a "super sweet". So it's time to pick the rest of the mature ears and freeze them for storage.

With about 20 ears, shucking them was the worst part of the operation. You want to freeze them immediately after picking - I'm not kidding, they get less and less tasty every minute you wait...

After cleaning, they go into a big pot of boiling water for 5 minutes. This stops from working the enzymes that are turning the sugars into starches. Then they are quickly cooled in an ice water bath to stop the cooking.

Cut the kernels off the cob, and into a freezer bag. I got two gallon sized bags from 20 ears. We'll have some tasty corn this winter!