Sunday, September 12, 2010

June Update

June is usually a good month in the garden: everything is usually planted by now and the weather has settled into summer, so all there is to do is weed, water, and watch things grow. We did have a very cool early summer this year, so I wasn't able to direct seed or transplant out any hot weather veggies until early or mid this month.

The main garden is mostly planted by the end of June. Peppers are under the plastic tunnel, as it's still not warm yet.

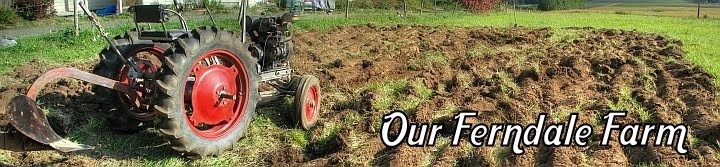
We had a wet spring and a cool early summer, so I had to wait until the ground dried out enough to put in the new garden space for this year. This is the area I plowed last fall and had a cover crop in over the winter. I got my first transplants in the ground in late May, so all hot weather summer crops in this garden.

My new tool for weed rustling this year is a Valley Oak wheel hoe.


The last few years I was spending way too much time weeding by hand and with my scuffle hoe, and now with twice the garden space I am going to have a lot of weeding to do. I did a little research and found a wheel hoe to be the tool for weeding in the rows between my raised beds. Wheel hoes have been around for decades. Before tractors, check that, before horses were readily available and cost efficient for small farmers, all work was done by manpower. Planet Jr. made many models for hand use or for drawing behind horses. There are 4 or 5 different companies making wheel hoes today, and each have their strengths and weaknesses. Except for Glaser ($350-$399!!), Valley Oak has been around the longest and offers a modern version of the classic tool with all the same accessories available as other manufacturers. I go through the rows once a week - takes about 30 minutes to do all the rows in both gardens - before that would have taken an entire day. The point is to keep weeds from getting established, so it must be done regularly.


I am also using a new tool for weeding around the plants in my raised beds. Eliot Coleman is a big proponent of colinear hoes, so I thought I would try one out. I found one at the feed store being sold as an "onion hoe". Not sure what that means, but once I took the angle grinder to it and sharpened up the leading edge, it was ready to go. The blade on this hoe is at nearly a right-angle to the long handle, and is used standing straight up, with a grip and motion like raking leaves. Like with the wheel hoe, once a week all the beds are gone through. The blade is slid along just under the soil surface, slicing off small weeds before they are big enough to be able to regrow, and keeping the soil surface broken up and dry to help prevent further weed germination. No need to clean up the beds afterwards and no more hand weeding! Hooray!

Tuesday, May 25, 2010

Seedlings and transplants

I've started more transplants from seed this year than ever before. This will be my biggest garden and I plan on filling it up completely, so I have had transplants all over the place!

5/1: Brassicas and lots of tomatoes hardening off outside and in my little cold frame. The brassicas were transplanted a week later.

5/15: Tomatoes were transplanted after about 2 weeks outside. I had to wait until the ground was ready for rototilling. These are by far the best looking transplants I've grown! This year I wanted to grow my early tomatoes and peppers/eggplant under low tunnels. I bought a "Quick Hoops" tube bender (from Johnny's) to make heavy duty 1/2" EMT hoops to cover with greenhouse plastic.

On a cloudy day where we don't even get to 60 degrees (we've had a lot of those lately) it will be a balmy 85 in the tunnel. On sunny days, I lift up one entire side of the plastic for ventilation and it stays around 90 inside. So far the tomatoes are loving it.

5/25: Pepper seedlings will go under a low tunnel as well. I'll cover the soil with black plastic before transplanting in order to trap even more heat. In our mild summers, keeping the soil warm is the most important controllable condition in order to keep hot weather peppers and eggplant growing well.

Eggplant, above, and melons and cukes. This is my first try with melons. Really, they won't grow well up here without a lot of special attention. They'll need black plastic mulch and a low tunnel, plus a good summer, in order to produce much. However, I've heard from many sources that a freshly picked, homegrown melon is just about the sweetest, best tasting this that can come out of the garden, so I have to give it a shot. These will be ready to transplant out (weather permitting) in a week or two.

Monday, May 3, 2010

Still here.

I've been busy lately and haven't been up for much posting, plus my camera died! But I've replaced it and I have a few back-posts to get up, which can be found below...

Saturday, April 17, 2010

Making COF

The last few years I've had success using a combination of store-bought compost and manure and various mixtures of organic fertilizers. Generally speaking, organic fertilizers are not as potent or as fast acting as synthetic chemical fertilizers, so one must use a greater volume, more often. With twice the garden space as last year (up to almost 3000 sq ft now!), I'll need so much that I decided to mix my own complete organic* fertilizer (COF). The famous Steve Solomon developed a mix tailored to our slightly acid and heavier northwest soils that I used as my guide. I followed the recipe given here, on the third page of an excellent article about homemade fertilizers written by Steve.

I bought ~50 lb bags of each ingredient, all of which I was able to source at local feed stores (I had to go to two to get everything).


The components in the mix can vary, based on what's available locally (and cost!). In my mix I am using (CCW from upper right) 4 parts cottonseed meal , 1 part kelp meal, 1 part rock phosphate, 1/2 part limestone flour (calcium carbonate), and 1/2 part dolomite lime.

The finished product.

Total initial ingredient cost was about $130. The kelp meal is about $75 of this, and I could have used blood or bone meal instead and saved money, but you can read in the article I linked to and see why I chose kelp meal. This made about 25 gallons of fertilizer, enough to cover all my ~3000 sq ft @ 4-6 qts/100 sq ft. I will probably go through half of another bag of seed meal this year to have enough for side dressing the heavier feeding vegetables, but the other ingredients should be enough for the next 2 or 3 years. That boils down to ~$60 a year over the next 3 years for all the fertilizer I need, and my compost is free.

This system (compost, COF, and cover crops) is far better than simply using water soluble synthetic fertilizers; it provides all the major and minor plant nutrients, improves the soil tilth with the addition of decomposed organic matter, feeds soil biota and increases soil biological activity, controls soil erosion and nutrient leaching, and builds a solid foundation of soil health that will help the garden produce for years. $60 a year seems like a pretty good deal to me.

*the cottonseed meal in this batch is not organic and probably GM, but the kelp meal is organic. I have since found that I get organic linseed meal locally, which is what I will use in the future. The mined substances, rock phosphate (OMRI listed) and limes, are minerals so they're pretty much organic...

Saturday, April 10, 2010

Cover crop cutting

Clover. Lots of clover.

The crimson clover cover crop sown late in the fall is doing great in some beds, and not so good on others (the far beds in the photo). Our winter came very late this year, and I held off on clearing out the beds and getting the cover crop sown for as long as possible so I could keep picking off my tomatoes, peppers, eggplant, and beans. Turns out I waited too long. I got half of the garden beds planted early enough, but I was too late in getting the other half the cover crop in, so it was frozen out after a few months. Not a huge deal, but I didn't like the beds sitting bare while winter and spring rains pounded down on them with no protection from erosion, compaction, and leaching away of nutrients. Learned my lesson.

I started cutting it by hand (slowly) with my little Japanese hand-held scythe, but soon enough brought out the weed-whacker, which made shorter work of it. Raked it all up and put it on the compost pile. Hopefully the roots remaining in the soil will break down over the next couple weeks as the bed starts to dry out, and I'll be able to turn over the top 6" of each bed, add compost and fertilizer and plant!

It didn't create as much organic matter as I thought it would; mixed with horse manure this will break down and probably only provide enough compost for maybe an inch over two 25' beds. So next year I need to get it planted earlier in all the beds, or possibly sow a large area of crimson clover in a section of the pasture just for composting material...I think chickens will eat it too, so it can be turned into eggs!